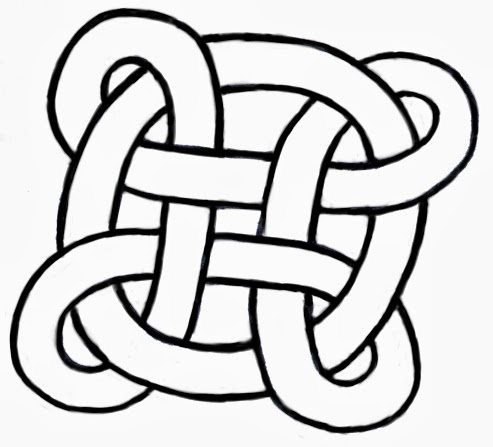
 In an earlier post, I talked about knots. And knots are entanglement, there is no doubt. They serve to bind, secure, to tie down, to hang up, and even to keep our shoes on.
In this post I will talk about knots as a way to entangle two threads. I will continue to use the planar method of showing knots, combined with precedence at crossover points. An over-under rule is used to keep the knots maximally entangled.
In addition, I will show how to draw knots using my drawing style, which is a little bit scratchboard-watercolor, a little bit woodcut, and a lot retro. You can find more of my style (and lots more knots) at my Pinterest artwork board.
 The over-under rule characterizes one of the best ways to organize the making of a knot. In its simplest form, you can see a less confusing, more iconic representation.
This knot is a clover interleaved with a ring. The ancient name for the clover symbol is the Saint John's Arms. The clover is used to symbolize places of interest on a map, the command key on Macs, and cultural heritage monuments in Nordic countries, Estonia, and a few other places. This symbol has been around for at least 1500 years.
The other day while working on a complicated programming problem, and I drew such a clover absent-mindedly and realized suddenly that I could pass a ring through its loops, hence this figure. When you draw the clover as a knot, it is also called the Bowen knot.
It seemed like the simplest thing at the time. Then I tried to draw it in its current form: not so easy! After a few hours (off and on) with Painter yesterday I finally had this figure smoothed out in nice outlines. Today I shaded and colored it. Sure, maybe the purple is a bit much, but I like the simple forms and the way they intertwine.

Then I wondered how a ring might enter the picture. I tried one way and then it hit me: use the over-under rule.
This is the figure I ended up with. Now that's much simpler than the first, and iconic in its own way, I think. It could be a logo in an even simpler form. O-infinity? Well, there's nothing like a logo created for no particular reason!
But how are such knots created, really? Is there an easy way?
 Start with a line drawing showing the paths of the two threads. This is how I started. I put them at an angle because I drew the oval first. This was a natural angle for me to draw it right-handed.
Then I turned the page and drew the infinity so that the oval passed through each of the figure-eight's loops.
It wasn't exactly symmetric. Though I do like symmetry, I like even more to make my drawings a bit imperfect to show that they are hand-drawn. If I were designing for a logo, though, I'm not sure I'd make the same choice.
 Next I drew the figure again, but with an indication (by breaking the lines so they don't quite cross over each other) of which thread is on top and which crosses under.
Here is my first attempt.
But there is a basic flaw: if I were to grab the oval and pull it, it would easily come loose from the figure-eight! Needless to say this wasn't the knot I was looking for so I redrew it again using the tried-and-true over-under rule which states this: as you pass along a thread, it must pass first over and then under the other threads, alternating in succession.
 Here is the result of redrawing it. As you can see, it has a much nicer integrity. It seems to be entangled properly.
So now I have a basic plan for the entanglement of the knot. Now I must plan to draw the knot using outlines for each thread. This means that each thread must really be two lines that are parallel to each other. I call this the schematic version.
I use the original line drawing as a guide and draw two lines parallel to the original line, one line on each side. Originally I worked in black ultra-fine Sharpie on thick 32# copy paper.
 The wide lines drawing, as you can see, is getting a bit complicated. But fortunately I have a legend for which lines to draw in and which lines to erase: the second hidden-line diagram above.
I use this as a template so I can redraw the image, using only the new wide lines. With this I can create a hidden-line version of the wider knot. It is easy to accomplish this by placing the blank sheet over the original and using it as tracing paper.
Of course when I do this, I avoid drawing the centerline. This keeps the drawing simple. In this way, you can see that the centerline was a for-reference-only diagram for what follows.
 Here is the wide hidden-line version. This one is much clearer and certainly much closer to what I was trying to create.
But it is a bit flat, like a road. And the crossings are really dimensionless.
I brought this into Painter and smoothed out the lines, making them a bit more consistent. Then I worked a bit of magic by using my woodcut style.
How do I do that?
 I'm glad you asked! At each crossover, I draw three or four lines on the "under" sides of the crossover. Then I draw to create wedges of black that meet very close to the "over" lines. Finally I use a small white brush to sculpt the points of the wedges, making them very pointy.
This simulates what could be created using a V-shaped ductal tool with linoleum or wood.
Well, this process takes a bit of time. If you count, you can see I had to create about 40 wedges, sculpting each of them into a perfect line or curve. But I am patient.
 Sometimes I widened the "under" lines to meet the outermost wedges. This makes a more natural-looking woodcut.
Finally, in Painter I use a gel layer and fill in color on top, filling in each area of the thread using a slightly different color.
This gives me the final result, a unified entanglement of two interesting threads! This result is quite similar to the scratchboard-watercolor look that I like. I used the same technique exactly to create the knot at the top of this post. In past posts, I have used this technique to create many illustrations, of course. I like this look because it's easy to print and it is good for creating logos.
 For instance, if I take the plain wide line version and blacken the white background, I get a version that can be manipulated into a logo form. After that, I invert the colors of the image and that gives me a clean black logo on white. Then I use a layer in Screen mode to colorize the black segments of the threads.
Here is a logo version of the knot, expressed in colorful tones. But this won't do for O-infinity at all! It might easily be an O in purple and the figure-eight in navy blue. On black.
But that's not my idea of a good company name, so I will leave it like this!
There are plenty of styles for redrawing this knot that make interesting illustrations.
 This one is not a knot, really. But it is an interesting redrawing of the figure.
This is called an inline treatment.
Remember the Neuland Inline font that was used for the movie Jurassic Park?
This figure can be used as the start of about 100 different illustrations, depending upon which crossings you want to black in or erase.
I tried several before I realized that it wasn't the direction I wanted to go with the logo.
Trial-and-error is often the way with creativity!
I have other knots I'd like to draw, but they certainly do take time! It's good to be drawing again.


